How To Eject Thumb Drive From Chromebook Quickly

If you don't know how to eject thumb drive from Chromebook, then continue reading to learn how to do so. A thumb drive is a small-sized solid-state drive that can be connected to any device via a USB port.
The USB drive is also sometimes called a thumb drive because of its small size and compact shape. These drives are generally removable and smaller than optical discs.
These small drives are available in different data storing sizes which range from a minimum of 256 MB to a maximum of a few Terabytes.
The thumb drives are popular because of their data storing capacity and portability. Data in these devices is stored through integrated circuit design, allowing agile rewriting and dense data storage. To eject the thumb driver from Chromebook follow below.
What is a Chromebook?
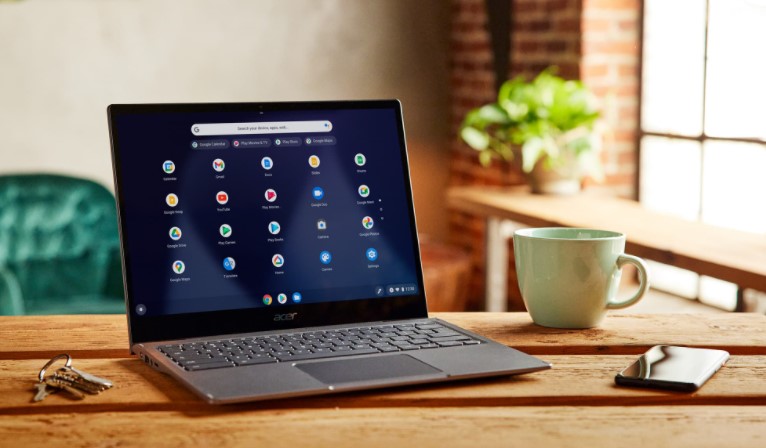
Chromebook Laptops runs on a Linux based Chrome-OS. These laptops run on a very simple operating system which makes them easy to use. The Chromebooks are used primarily to perform various tasks using the Google Chrome Browser, where most of the work and play resides within a Chrome tab.
The Chrome OS mainly focuses on Google Services like Gmail, YouTube, Maps, and Google Docs. It uses web-based Chrome apps that are available on the Chrome Web Store.

Chromebook laptops are great unless they are bought with a specific purpose in mind. These laptops aren’t good for gaming purposes and are only capable of running the Android games which are available on Chrome Web Store.
The Chromebooks aren’t an ideal option for creative professionals except for writers. Programs like 3D editing and Photoshop are also not possible in these devices, as they are not powerful enough to run the programs.
But, if most of your work is internet-based and you use only Android applications you should go for a Chromebook. The laptop will give you optimal results for such tasks. If you remove the thumb drive improperly from your Chromebook, there is a possibility of your thumb drive or flash drive being corrupt. When you insert your thumb drive into the Chromebook, the Chrome OS constantly communicates with the thumb drive.
Thus, if you remove the thumb drive from the laptop without ejecting properly, there is a strong chance that you might lose part of your data or the complete data. This makes the thumb drive corrupt or unusable as the Chromebook would be constantly communicating with the drive.
Let us now have a look at the steps to eject thumb drive from Chromebook.
Why Should I eject a usb from a chromebook?
Most of us have become conditioned over time and simply unplug a thumb drive without clicking the Safely Remove Hardware ejecting option. But is it necessary to eject USB from Chromebook the right way?
Generally, we just wait for the flash drive or USB to finish copying the data and then yank them. This might not be the most conservative procedure, yet it's not going to make much difference. In a worst-case scenario, you might end up in data loss, corrupting the files, or even more likely risk corrupting the entire storage device.
So it is worth knowing what happens when you remove flash drive from Chromebook without clicking the safety eject option and what could possibly go wrong.
What could possibly go wrong?
If you unplug your USB or flash drive while writing the data, it can end up being corrupted. For instance, if you are copying a file onto the drive or having a file open on the drive, it is effectively in use. Removing the USB device in the middle of a process results in data loss or corrupting the drive.
STEPS TO EJECT THUMB DRIVE from chromebook
STEP 1:
You must open the launcher that is located in the lower-left side corner of the Chromebook. You can also access the launcher by pressing the Finder Key, indicated by a magnifying glass and search for the launcher.
STEP 2:
To view USB Drives, like your thumb drive inserted to your Chromebook, you have to select the Files App, which is indicated by a blue icon with a folder, to open the File Explorer App. If you don’t see the Files App, you can click on View All to see all the applications installed on your Chromebook and access the File Explorer App.
STEP 3:
In the File Explorer App, you can find a list of tabs and all the connected devices to your Chromebook. Search for the name or the model number of the thumb drive you want to eject, from the list.
All users must know what they download on their Chrome OS computers, but most people don't bother because the interface is not so high and makes the PC take a long time to do things.
When you browse the web, everything is so slow. This is a problem that happens with all computers, but it happens more when you use a Chromebook. The main reason why Chrome OS is slow is because of Google's website speed.

STEP 4:
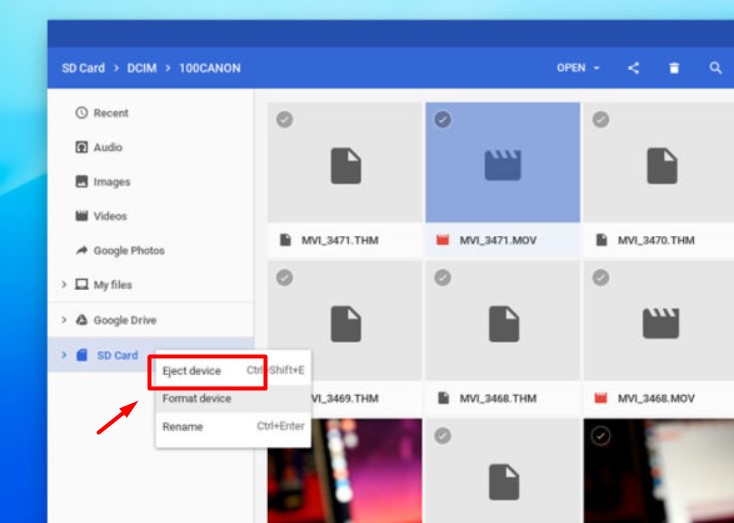
To eject the device you have to click on the Eject icon which is present on the right side of your device name or model. Once you are done with this, you will see the device disappear from the list of tabs in the File Explorer App.
How To Eject Memory Card From Chromebook
The process of removing a memory card is similar to the method mentioned above.
STEP 1:
Open the launcher that is located in the lower-left side corner of the Chromebook and select the Files icon. You can also access the launcher by pressing the Finder Key, indicated by a magnifying glass, and search for the launcher.

STEP 2:
After opening the Files, you will find the list of external devices(like SD card or USB) on the left navigation menu.
STEP 3:
To eject the device, you have to click on the Eject icon, which is present on the right side of your device name or model. Once you are done with this, you will see the device disappear from the list of tabs in the File Explorer App.

Do I need to properly Eject every time?
If you don't want to lose any data or don't want to get your device corrupted, you should properly eject before you remove your device from Chromebook.
Computers constantly check and communicate with any external devices plugged into their USB ports. Laptops and Chromebooks are no exception for it. Even when the thumb drive is in an ideal state( no data transferring data between the Chromebook and the drive), their communication exists.
Even though corrupting that drive is very rare and very unlikely, I still recommend you to follow the ejecting procedures. Yeah, I know it can take your whole two minutes, but it's always better to be safe than sorry, right?
Conclusion
Sometimes you might face an error that the device is ‘still in use.’ But it simply means that the Chromebook is still communicating with your device and is in the middle of a process, meaning that the Eject icon would not work.
You can wait for a while and try again to eject the device. If the problem still exists, you can shut down your Chromebook and then remove your device safely and not corrupt your device.
You must eject your thumb drive safely every time the Chromebook is communicating with your device, and there is a high possibility of getting your device corrupted.
Even when you are not using your thumb drive or any USB drive, but it is still connected to your Chromebook, you must eject it in the exact process as the Chromebook has constant communication with the device.
You can remove your thumb drive without ejecting it properly and save time, but it hampers communication and results in loss of data.
So this is all about how to eject thumb drive from Chromebook. I hope this tutorial will help you eject the thumb drive from your Chromebook. Give a thumbs up to this article, if you got what you were looking for. Cheers!!
